
Photoshop Tutorial :: Using the Extract Filter
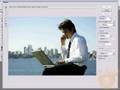
Check this video out at Hi-Res here: www.tutvid.com Learn to use the extract filter!
Video Tutorial Rating: 4 / 5
Don’t forget to check out our other video tutorials or share this video with a friend.
 0 votes
14 responses to “Photoshop Tutorial :: Using the Extract Filter”
Leave a Reply
Video Tutorials
Bringing you the best video tutorials for Photoshop, Illustrator, Fireworks, WordPress, CSS and others.
Video tutorial posted 09/10/12
Category: Photoshop Tutorials

Pages
Random Videos


Video Categories
- 3DS Max Tutorials (150)
- After Effects Tutorials (160)
- C# Tutorials (121)
- Colour (6)
- Crazy Effects (1)
- CSS Tutorials (120)
- Dreamweaver Tutorials (139)
- Excel Tutorials (127)
- Featured (10)
- Fireworks Tutorials (131)
- General Effects (9)
- HTML Tutorials (143)
- Illustration and Vector (1)
- Illustrator Tutorials (174)
- IMove Tutorials (119)
- Lightroom Tutorials (145)
- People and Faces (3)
- Photoshop Tutorials (169)
- Text Effects (7)
- Uncategorized (32)
- WordPress Tutorials (140)
Tags
VideoTutorials.co.uk
-
Videotutorials.co.uk offers the web's best Photoshop tutorials, Illustrator video guides, CSS and HTML tutorials and much more all in one place. With new videos being added every day, you can learn how to master software and code to give your images and website some great effects.
Our site has beginner, intermediate and advanced video tutorials of varying lengths so you can learn a new skill at your own speed and level. So whether you're a web designer, print designer or just wanting to edit some family photos, you can get to it quickly and easily using these free video guides. (more)
I like the way this guy talks.
I just created a drawing in photoshop. I would like to now take that drawing (without the white background) and inset it into another photoshop project that I have going on. Can you explain how I can do this without using the feature to extract? One thing I should note is that I used dodge and burn features on some layers. Thanks Cory
How do you filter youtube results? I am asking in this video because some dillhole put it at the top of my search. So obviously it is the most relevant video to my search parameters.
I want to filter out minecraft videos from my searches on survival. How do you do this? There are no lists of filter commands anywhere. Even the simplest of search/filter engines allow you to add “NOT” or “-” (Minus) to block out specific results.
Hey youtube, WTF?
You guys should check out this videos out they are really helpful youtube.com/user/ShanDanVideo
isn’t masking with the pen tool easier? which would you recommend?
How can you resize the extracted image???
lol 2006 😛
Why use the Extract filter over the Magic Wand? In the past, I’ve used the magic wand to select a part of the image to remove. I wasn’t aware of extract. Lots of problems with the wand, so this is nice. The wand often selects the wrong things or not what you want to select.
I LOVE PS 🙂
help me please? when i click on the eraser and i try to erase the background that was left over it doesnt rub it out!? someone please help me
Couple more tips. Don’t use the history brush. You can but you see in this tut one of the issues with it. I normally duplicate the image (not just the layer). Then use the Clone Stamp tool and you can zoom in on one pixel and with a 1 pixel brush set it perfect. The benefit of this is you have another untouched version to look at while you work.
The other thing is don’t do this on a trans, bg. Create a white and black layer (2 total), and go back and forth depending on the pic.
Great tut, thanks!
Just as a helpful tip, rather than trace straight and angled lines like your first image using freehand, simply click one spot, then go to the end of the line you want it to draw, hold shift, then click again. It will connect both places where you clicked. A huge time saver and makes life so much simpler 😉
MAGNETIC LASO! 😀 save’s my life. doing it this way would kill me XD
Hey I have a black & white photograph someone wants to have printed on some shirts. They want me to print black ink on khaki shirts. I need to show them what it will look like first. Is there any way to separate just the black part of the photo, put it on a layer, on top the khaki layer below so client can see how the shirt will look w/ just black ink printed on the shirt? I tried w/ magic wand but the separation is just bad- still has too much opaque white in there- I only need the black parts