
Slicing and Exporting your design – Fireworks Tutorial Part 1
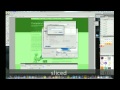
In this tutorial, I will show you how to slice your design and export that into html document. I will show you, how to make changes to your export files in t…
Video Tutorial Rating: 4 / 5
Don’t forget to check out our other video tutorials or share this video with a friend.
 0 votes
9 responses to “Slicing and Exporting your design – Fireworks Tutorial Part 1”
Leave a Reply to Paul Lance Cancel reply
Video Tutorials
Bringing you the best video tutorials for Photoshop, Illustrator, Fireworks, WordPress, CSS and others.
Video tutorial posted 26/06/13
Category: Fireworks Tutorials

Pages
Random Videos

Video Categories
- 3DS Max Tutorials (150)
- After Effects Tutorials (160)
- C# Tutorials (121)
- Colour (6)
- Crazy Effects (1)
- CSS Tutorials (120)
- Dreamweaver Tutorials (139)
- Excel Tutorials (127)
- Featured (10)
- Fireworks Tutorials (131)
- General Effects (9)
- HTML Tutorials (143)
- Illustration and Vector (1)
- Illustrator Tutorials (174)
- IMove Tutorials (119)
- Lightroom Tutorials (145)
- People and Faces (3)
- Photoshop Tutorials (169)
- Text Effects (7)
- Uncategorized (32)
- WordPress Tutorials (140)
Tags
VideoTutorials.co.uk
-
Videotutorials.co.uk offers the web's best Photoshop tutorials, Illustrator video guides, CSS and HTML tutorials and much more all in one place. With new videos being added every day, you can learn how to master software and code to give your images and website some great effects.
Our site has beginner, intermediate and advanced video tutorials of varying lengths so you can learn a new skill at your own speed and level. So whether you're a web designer, print designer or just wanting to edit some family photos, you can get to it quickly and easily using these free video guides. (more)
Part 2 is hopefully coming… I have learned so much from this guy and his tutorials.
Do you have to export as CSS in order to get the text boxes to appear as text instead of as images? When they’re sliced and appear as images it’s impossible to optimize your page (and thus your site) for search engines. That’s the biggest drawback I find to creating pages this way in Fireworks.
where is part 2
First tutorial is for beginners mate. I was going to show to export text using CSS.
No I just did that quickly to show to convert everything to html and images.
there is a way to export it as a text aswell.
I was going to show that on the second part.
he basically sliced the whole page up into images and let the program re interlace them. this is NOT how a professional should do their work.
The text boxes got exported as an image? or as text so I can select the text, copy etc.?
html
This one is html only but you can export css and html aswell. Just change the setting when you export the files.