
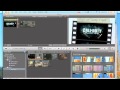
After Effects Tutorial – De-rezzing your video, part 2
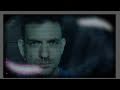
This tutorial covers some of the basics in creating a classic ‘low-res’ video monitor including scan lines, static and vignetting. The theme will continue in…
Video Tutorial Rating: 4 / 5
Don’t forget to check out our other video tutorials or share this video with a friend.
 0 votes
18 responses to “After Effects Tutorial – De-rezzing your video, part 2”
Leave a Reply
Video Tutorials
Bringing you the best video tutorials for Photoshop, Illustrator, Fireworks, WordPress, CSS and others.
Video tutorial posted 23/09/14
Category: After Effects Tutorials

Pages
Random Videos
Video Categories
- 3DS Max Tutorials (150)
- After Effects Tutorials (160)
- C# Tutorials (121)
- Colour (6)
- Crazy Effects (1)
- CSS Tutorials (120)
- Dreamweaver Tutorials (139)
- Excel Tutorials (127)
- Featured (10)
- Fireworks Tutorials (131)
- General Effects (9)
- HTML Tutorials (143)
- Illustration and Vector (1)
- Illustrator Tutorials (174)
- IMove Tutorials (119)
- Lightroom Tutorials (145)
- People and Faces (3)
- Photoshop Tutorials (169)
- Text Effects (7)
- Uncategorized (32)
- WordPress Tutorials (140)
Tags
VideoTutorials.co.uk
-
Videotutorials.co.uk offers the web's best Photoshop tutorials, Illustrator video guides, CSS and HTML tutorials and much more all in one place. With new videos being added every day, you can learn how to master software and code to give your images and website some great effects.
Our site has beginner, intermediate and advanced video tutorials of varying lengths so you can learn a new skill at your own speed and level. So whether you're a web designer, print designer or just wanting to edit some family photos, you can get to it quickly and easily using these free video guides. (more)
Good voice, makes it easy to follow your instructions thank you!
Can you make a quick video on how to make the first second static you got
in your video and where you got the sound from?
Sorry – no beginner stuff at the moment. But I’m thinking about it. Not
much time on my hands these days, so I can’t promise anything.
@TheStrayCross It’s just a shape layer with some keyframes and a wiggle
expression. I’ll try and do a short video on how to create your own in the
next day or so.
Very Nice,ty
can’t wait!!!!!!!!!!
Get Magic Bullet Misfire for even more effects to add to this.
This is one of the best tutorials ever made…! Concise and you get
straight to the point! Thank you v.much!
where did you get the sound from?
This looks like where ChimneySwift11 learned how to do one of the effects.
There are many effects you can experiment with here. You could use Grid
instead of Venetian blinds if you want the scan lines to be coloured (or
drop a red solid behind the venetian blind layer). As far as the noise
values are concerned, yes, more noise will look more like an old TV.
You should drag the screen lares so that they dont have grain on them. It
kind of breaks the illusion.
@shortformvideos this works 😀 thank you so much 😀 you are gona earn a sub
from me 😀 and again a like pn part 3 and 4 😀
@shortformvideos Wow the example video is great you have the perfect face
for a futuristic post apocalyptic message 😀
@ribenawrath Thanks for sharing your suggestions. While CA is a feature of
the lens rather than resolution, I take your point, and if you watch the
last part of this series, you’ll see I have an example of how to add colour
separation (which you could use to create a pseudo-CA effect). The problem
with rendering down and then upscaling is that it creates a soft, blurry
appearance (AE uses sub-pixel sampling) rather than a low-res feel. You’d
be better off using the Mosaic effect for this.
@forestpump Just play with the levels or curves to push the red channel
down a bit and you’ll get a similar look. Apply it to an adjustment layer
if you’re colour correcting multiple layers (beneath the adjustment layer).
Enjoyed the Tutorial. Thanks. I would suggest putting the reflection layer
above the static layer….I think the reflection exists on the glass and
not on the signal image.
I really enjoy your style, Lawrence. How you track the cursor movements and
zoom in and out to highlight the relevant parts. Thanks for sharing your
expertise.