
41. Structure the WordPress Sidebar Widget Area | Thesis 2 Beginner Guide
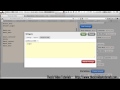
Thesis Video Tutorials Guides For Beginners – thesisvideotutorials.com The WordPress Sidebar is where we can display small pieces of information that we would otherwise not add to our post content. Now that we have finished structuring our post content, the last area of our main content container to customize is the sidebar area. In this tutorial we are going to set up the structure of our WordPress sidebar and the next video will focus on customizing how the widgets look. In the Thesis CSS Editor, create a new widget package. Give the package a name and a reference and in the the CSS Selector add the .widget class. The first thing we want to do is make sure that we can control the amount of content that is added to the sidebar and that the content does not flow into other areas of our website. To do that, go to the Advanced CSS area and paste the following code .widget {overflow hidden; } In the font settings of the options area, choose ‘Calibri’ from the font dropdown, size the font to 14 pixels and add a line height of 20 pixels. Lastly, add 20 pixels to the bottom margin. Save the package, add the reference to the Skin CSS and save the CSS. Refresh your site to see the changes. In the next video we will add some generic widgets into the sidebar so that we can customize how the widgets are displayed. If you know how to add widgets already, go ahead and add the categories and blogroll widget. It does not mean you have to have those widgets active in the skin when you …
Video Tutorial Rating: 0 / 5
Don’t forget to check out our other video tutorials or share this video with a friend.
 0 votes
Video Tutorials
Bringing you the best video tutorials for Photoshop, Illustrator, Fireworks, WordPress, CSS and others.
Video tutorial posted 09/01/13

Pages
Random Videos


Video Categories
- 3DS Max Tutorials (150)
- After Effects Tutorials (160)
- C# Tutorials (121)
- Colour (6)
- Crazy Effects (1)
- CSS Tutorials (120)
- Dreamweaver Tutorials (139)
- Excel Tutorials (127)
- Featured (10)
- Fireworks Tutorials (131)
- General Effects (9)
- HTML Tutorials (143)
- Illustration and Vector (1)
- Illustrator Tutorials (174)
- IMove Tutorials (119)
- Lightroom Tutorials (145)
- People and Faces (3)
- Photoshop Tutorials (169)
- Text Effects (7)
- Uncategorized (32)
- WordPress Tutorials (140)
Tags
VideoTutorials.co.uk
-
Videotutorials.co.uk offers the web's best Photoshop tutorials, Illustrator video guides, CSS and HTML tutorials and much more all in one place. With new videos being added every day, you can learn how to master software and code to give your images and website some great effects.
Our site has beginner, intermediate and advanced video tutorials of varying lengths so you can learn a new skill at your own speed and level. So whether you're a web designer, print designer or just wanting to edit some family photos, you can get to it quickly and easily using these free video guides. (more)
Leave a Reply