
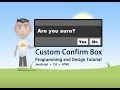
Custom Confirm Box Programming JavaScript CSS Tutorial
Lesson Code: http://www.developphp.com/view.php?tid=1385 Learn to create custom confirm boxes using core JavaScript and CSS. We supply handy tips for using t…
Don’t forget to check out our other video tutorials or share this video with a friend.
 0 votes
19 responses to “Custom Confirm Box Programming JavaScript CSS Tutorial”
Leave a Reply to Sabir Kothiya Cancel reply
Video Tutorials
Bringing you the best video tutorials for Photoshop, Illustrator, Fireworks, WordPress, CSS and others.
Video tutorial posted 17/10/14
Category: CSS Tutorials
Tags: Confirm, Custom, Javascript, Programming, Tutorial

Pages
Random Videos
-
After Effects Tutorial – 39 – Motion Tracking
7,653 views
-

Smoky Wallpaper Photoshop Video Tutorial
7,722 views
-
28 – Introduction to Dreamweaver Tutorial (CS5)
3,430 views
-
32 – Introduction to Dreamweaver Tutorial (CS6)
6,946 views
Video Categories
- 3DS Max Tutorials (150)
- After Effects Tutorials (160)
- C# Tutorials (121)
- Colour (6)
- Crazy Effects (1)
- CSS Tutorials (120)
- Dreamweaver Tutorials (139)
- Excel Tutorials (127)
- Featured (10)
- Fireworks Tutorials (131)
- General Effects (9)
- HTML Tutorials (143)
- Illustration and Vector (1)
- Illustrator Tutorials (174)
- IMove Tutorials (119)
- Lightroom Tutorials (145)
- People and Faces (3)
- Photoshop Tutorials (169)
- Text Effects (7)
- Uncategorized (32)
- WordPress Tutorials (140)
Tags
VideoTutorials.co.uk
-
Videotutorials.co.uk offers the web's best Photoshop tutorials, Illustrator video guides, CSS and HTML tutorials and much more all in one place. With new videos being added every day, you can learn how to master software and code to give your images and website some great effects.
Our site has beginner, intermediate and advanced video tutorials of varying lengths so you can learn a new skill at your own speed and level. So whether you're a web designer, print designer or just wanting to edit some family photos, you can get to it quickly and easily using these free video guides. (more)
Which software did you use? notepad?/
i am creating a confirm just like yours but i like to use onload !! and
have a link if the user click yes how am i going to do this??
instead of deleting, how can i change the function into just navigating to
other tabs in my website?
Thanks in Advance..
Nice Tutorial :)
Dear sir, it is really nice and useful tutorial. Thanks. But i have a
question is how can i use it to delete specific data from mysql database
dynamically instead of removing child ? Please help me.
This works really nice, thank you very much!
I added a function that automatically clicks “OK” when pressing the
return-key and I fit the CSS.
The only thing I don’t like is on screen size change.
Do you have an idea how to dynamically change the position/size
onScreenSizeChange (or something like that)?
+Adam Khoury is there way to do it like …
var x = Confirm.render(……)
if(x==true) …. else …….
and the confirmation message should return boolean
Nice video, maybe an idea for improvement: instead of sending an operation
to the yes method, why not sending the name of the function? By doing this
the yes method do not need adjustments (check for op) everytime a new
confirmation action is required.
My delete buttons aren’t working and I’ve wrote all of the JavaScript code
based on this video. Can anyone help? Here is my JavaScript code:
// JavaScript Document
function CustomAlert() {
this.render = function(dialog) {
var winW = window.innerWidth;
var winH = window.innerHeight;
var dialogoverlay = document.getElementById(‘dialogoverlay’);
var dialogbox = document.getElementById(‘dialogbox’);
dialogoverlay.style.display = “block”;
dialogoverlay.style.height = winH+”px”;
dialogbox.style.left = (winW/2) – (550 * .5)+”px”;
dialogbox.style.top = “100px”;
dialogbox.style.display = “block”;
document.getElementById(‘dialogboxhead’).innerHTML = “Acknowledge
This Message”;
document.getElementById(‘dialogboxbody’).innerHTML = dialog;
document.getElementById(‘dialogboxfoot’).innerHTML = ‘‘;
}
this.ok = function() {
document.getElementById(‘dialogbox’).style.display = “none”;
document.getElementById(‘dialogoverlay’).style.display = “none”;
}
}
var Alert = new CustomAlert();
function deletePost(id) {
var db_id = id.replace(“post_”, “”);
document.body.removeChild(document.getElementById(id) );
}
function CustomConfirm() {
this.render = function(dialog,op,id) {
var winW = window.innerWidth;
var winH = window.innerHeight;
var dialogoverlay = document.getElementById(‘dialogoverlay’);
var dialogbox = document.getElementById(‘dialogbox’);
dialogoverlay.style.display = “block”;
dialogoverlay.style.height = winH+”px”;
dialogbox.style.left = (winW/2) – (550 * .5)+”px”;
dialogbox.style.top = “100px”;
dialogbox.style.display = “block”;
document.getElementById(‘dialogboxhead’).innerHTML = “Confirm that
action”;
document.getElementById(‘dialogboxbody’).innerHTML = dialog;
document.getElementById(‘dialogboxfoot’).innerHTML =’‘;
}
this.no = function() {
document.getElementById(‘dialogbox’).style.display = “none”;
document.getElementById(‘dialogoverlay’).style.display = “none”;
}
this.yes = function(op,id) {
if(op == “delete_post”) {
deletePost(id);
}
document.getElementById(‘dialogbox’).style.display = “none”;
document.getElementById(‘dialogoverlay’).style.display = “none”;
}
}
var Confirm = new CustomConfirm();
Cheers … Great that you explain each step in so much detail, very helpful
for JavaScript noons like myself
Gr8
And Product order form in HTML using JavaScript. Please
After practicing for awhile with this amazing code, I came up with a
question, something similar to Ben Stuijts’s point just with a different
approach. Instead of asking the “yes” function to do something and then
adding several “else if”, couldn’t the code just return true (yes) or false
(no) and then we can handle the situation as we see fit regarding the
instance which requires the confirmation? Sometimes a confirmation is
required through javascript (I mean not directly from a button or link).
Excuse my english and please, please, please bear with me if the question
is stupid, I’m an old man but so young to this coding thing 🙂 Thanks in
advance
hey Admin can you do some tutorials on php framework thank you
Thanks for your tutorials.
Your step by step website building tutorials are awesome.
Can you upload step by step tutorial for “SEARCH ENGINE”.
Please could you make a video of shopping cart in HTML, using JavaScript
Once again, Thank You so much Adam for another interesting and useful
tutorial. God Bless you!