
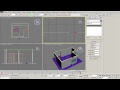
3ds max lighting tutorial with mental-ray part2
Hello friends, this is my very first tutorial. I wanted to create this for CGTUTS but i couldn’t that’s why i am uploading this tutorial here, In this tutori…
Video Tutorial Rating: 4 / 5
Don’t forget to check out our other video tutorials or share this video with a friend.
 0 votes
19 responses to “3ds max lighting tutorial with mental-ray part2”
Leave a Reply to prodesigner24x7 Cancel reply
Video Tutorials
Bringing you the best video tutorials for Photoshop, Illustrator, Fireworks, WordPress, CSS and others.
Video tutorial posted 02/07/14
Category: 3DS Max Tutorials

Pages
Random Videos


Video Categories
- 3DS Max Tutorials (150)
- After Effects Tutorials (160)
- C# Tutorials (121)
- Colour (6)
- Crazy Effects (1)
- CSS Tutorials (120)
- Dreamweaver Tutorials (139)
- Excel Tutorials (127)
- Featured (10)
- Fireworks Tutorials (131)
- General Effects (9)
- HTML Tutorials (143)
- Illustration and Vector (1)
- Illustrator Tutorials (174)
- IMove Tutorials (119)
- Lightroom Tutorials (145)
- People and Faces (3)
- Photoshop Tutorials (169)
- Text Effects (7)
- Uncategorized (32)
- WordPress Tutorials (140)
Tags
VideoTutorials.co.uk
-
Videotutorials.co.uk offers the web's best Photoshop tutorials, Illustrator video guides, CSS and HTML tutorials and much more all in one place. With new videos being added every day, you can learn how to master software and code to give your images and website some great effects.
Our site has beginner, intermediate and advanced video tutorials of varying lengths so you can learn a new skill at your own speed and level. So whether you're a web designer, print designer or just wanting to edit some family photos, you can get to it quickly and easily using these free video guides. (more)
I HAVE A PROBLEM! I change set up like in your tutorials, and something
with gamma is change and i cant found what is it. Now all is very bright
and render is all black, I didin”t see anithing!
Hi, good tutorial!! please i would like to know, what material do you use
in reflection map??
thanks
can i know how u find bevel profile in bevel list?
this traffic outside should make me crazy 🙂
what snaps do you use for garnish ?cuz i keep getting parts of the garnish
on the floor and parts of it on the celling T_T
@laske87 go to the render opton or press F10( if u have a default key
settings)……a small window pops out…….scroll down and press the
assingn renderer option…..then change the production setting to mental ray
holy shit where do you live? i never discovered a place where cars honk
THAT much^^
Hello dinninuyo, Sorry for noise my friends
hey man i really learned a lot from your tutorial!!! you’re awesome!! do
you know anything about adding caustic effects??
is it normal for a final render to take 165 hours ? , and the lenght of the
video will be like 15 mins . can someone please help me , i don’t know what
to do , isn’t there a solution to shorten the time ?
hi, in which city are u from india? i llbe coming tomorrow to india and
which to do some few lessons!do u teach sometimes?thanks
Great ……Your tutorial Is Really Helpful, I Just Start 3d max…So It Is
Very Useful For Me & More Others Too,Keep It UP….Thanks A lot.
hi people! I came to the material but I do not see the option “Arch +
design mental ray” (that red), the menu is standard, and when I open it
there is no Arch + design! Where can I find? help me please 🙂 by the way
tutorial is great!!!
Thank you, you’re really saving my life with this one here! That’s exactly
the tutorial I needed. So once again thanks for all the parts of the video.
hahaha, oh!, i will take care of that next time. Thanks.
@IPINALUGO Hi there, It’s called deviations, When you import the object in
3ds max, one panel will come up, there is an option in that panel called
deviations, (down to weld vertices option), minimum numbers will increase
the smoothness and curves steps of the object. Note : Do check your scale
settings while typing deviation units. Regards JAI jaigoel@live.com
Great tutorial – very straightforward and useful!! Thanks guy.
its easy to render when i create model house in autocad..?